
Industry · 8 min read · February 23, 2023
Complete Guide to Slab Stone Installation (0 to 100)
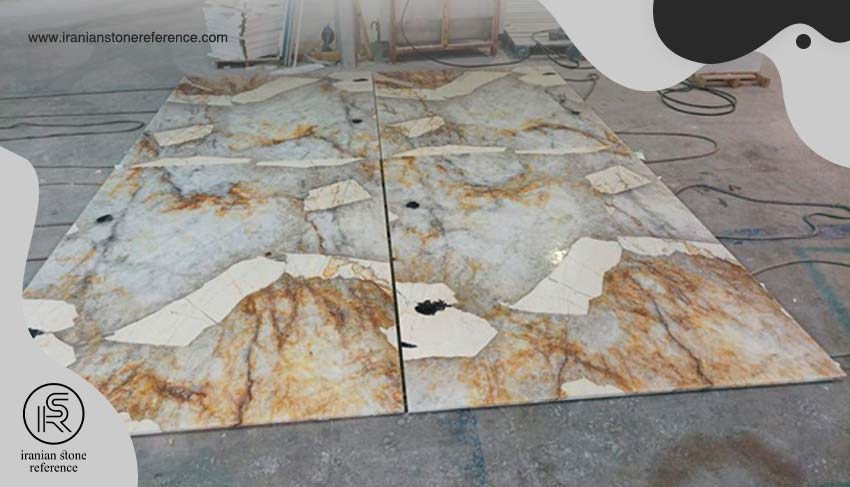
Slab stone installation is one of the most popular choices in modern interior design, especially for large living spaces and luxury villas. Unlike standard tiles, slab stones require a specialized installation process due to their larger dimensions and greater weight. This guide walks you through every step of slab installation from start to finish.
One of the most popular choices in modern interior design is the installation of slab stone throughout the home, particularly in large rooms such as living rooms and reception halls. When we talk about large villas, for instance, slab stone on the building facade and interior spaces multiplies the visual appeal of the structure many times over. However, there is a reality that cannot be overlooked: installing slab stones differs from laying standard floor, ceiling, or wall tiles because their dimensions and thickness are larger and their weight is considerably heavier. In this article, we will discuss the ins and outs of slab installation. Stay with us.
The first and most important thing to know about slab stones is that they are divided into two categories based on their dimensions. If the classification is based on the length of the stone, one group has dimensions smaller than 40×40 cm and is considered small stone, while the second group has dimensions larger than 40×40 cm and is considered large stone. For some stones, the height must also be considered. For stones with a height of less than one meter, the standard installation method is used. However, for stones with a height greater than one meter, a different installation method for slab stone must be adopted.
Large stones are installed using a method different from ordinary stones due to their relatively large size and weight. The slab stone installation process mainly includes the following steps: Step 1 – Drilling and grooving the stone; Step 2 – Using copper wire or galvanized lead wire; Step 3 – Fastening steel rods; Step 4 – Preparing the stone surface; Step 5 – Preparing the installation space; Step 6 – Installing the slab stone; Step 7 – Grouting.
In the first step, before preparing the stone for installation, you must drill the required sections with a drill bit. Generally, a wooden frame is nailed onto the back surface of the slab and the top and bottom surfaces are drilled. The drilling position is approximately one-quarter of the distance from each end of the slab's width. Each side has two holes with a diameter of 50 mm and a depth of 120 mm. The type of stone must also be considered — for example, if the width of the selected marble or granite is large, the number of holes must be increased proportionally. After drilling, a marble grinder must be used to connect the cavities. If the panel is large, fastening galvanized steel wire becomes more critical.
The first preparation step involves creating grooves for the copper or galvanized lead wire. The copper or galvanized lead wire must be cut into short 200 mm sections, and one end of the copper or lead wire is fixed to the resin epoxy with wood chips. The wire is then inserted into the hole and secured. The second step is placing the galvanized lead wire along the created cavity so that no wire protrudes from the top or bottom sides of the slab, ensuring a firm connection between adjacent stones.
In this step, the ribs embedded in the wall must be separated and then the steel rods can be fastened. When connecting the steel rods, first tie a rod with a vertical diameter of 6 mm and bend the knotted vertical rods with the rods embedded in the wall. Transverse reinforcement is used to bond the marble or granite panels. To understand stabilization requirements: if the panel height is 600 mm, the first horizontal rod is fastened approximately 10 cm above the ground level, and the copper or galvanized lead wire is fixed at the lower opening covering the first layer of panels.
Before installing the slab stone, you must locate the installation position of the first layer by accurately measuring the length, width, and thickness of the stone, then number the stones. Arrange the stones in the numbered order and maintain a 2 mm gap between each stone.
One of the most important points to observe before installing stone is ensuring the stone is dry. The moisture content of the stone must be less than 8%, and a protective material should be used to protect the surface. This process must take place in a clean, dry, dust-free environment. First lay the stone completely flat on a surface and apply the protective material evenly with a brush. After 24 hours, apply the protective material again in the same way. Before installing the slab stone, clean the surface that will be bonded to the wall.
Another important point to pay attention to is the requirements for connecting the lead or copper wire. Hold the stone in place and then straighten the copper or lead wire so the stone sits properly. In this way the slab stone leans outward, the right hand goes behind the stone and the copper or lead wire is tied to the horizontal reinforcement. The second point concerns connecting the lead or copper wires — these wires must not be tied too short, leaving excess slack. Use a wooden wedge of 30 to 50 mm to fill the gap between the slab and the base.
If during installation it becomes apparent that the stone specifications are incorrect or were miscalculated, or the gaps between them are uneven, the gaps must be filled with rubber pads. Then you can prepare grout with a small amount of plaster and liquid water and completely fill the gaps. The prerequisite is that the gaps must be completely clean first. Subsequently, all traces of plaster and grouting must be eliminated. You can choose the paste color according to the color of the slab stone to create better harmony. Use a clean cloth and wipe away all excess material.
When installing slab stone on floors, you must pay close attention to the surface slope. Water does not penetrate through slab stone unless it collects at a point due to improper grading. First excavate the area, remove loose soil, and compact the subgrade. The gravel and sand bed should be layered to a depth of 2 to 3 cm. Spread sand and level it with a trowel, but be careful not to compress and compact the sandy bed. Now it is time to install the slab stone. The starting point will differ depending on the stone size, its pattern, and installation direction. Gently place the slabs on the sandy bed and do not push them inward. Drawing a continuous string at the base of the wall helps straighten the slabs.
Depending on whether you want slab stone installed on the floor or wall, the square footage required, and the type of stone you have in mind, the cost of slab stone installation varies considerably. Even labor rates may fluctuate based on the stonemason's experience and skill. If lighting is to be incorporated into the slab stone installation, the installation cost will naturally increase. In general, to estimate the installation price, the difficulty of the work must be considered, and only those with expertise in this field can accurately assess this. Therefore, we recommend consulting with specialists in this field for accurate pricing.
← Back to Stone Knowledge